10 Jul 2011

Add meta tags and improve your search engine ranking

Most of you might already know what meta tags are. If you are new then listen. Meta tags are like guides to search engines to tell them what your site is about. Though their importance is less these days, you always have a advantage in search engine rankings over others who don't have it.

TIP: for all posts regarding EDITING HTML make sure that you have a downloaded copy of your template with you just in case anything goes wrong.

Here is how to add a meta tag to your blog.
  • Log in and get to DESIGN tab and in turn get to EDIT HTML section.
  • Check on EXPAND WIDGET TEMPLATES box and find this line  
  • <title><data:blog.pageTitle/></title>
  •  Immediately after it place this code
         <b:if cond='data:blog.url == data:blog.homepageUrl'>
        <meta content='Place your blog description here' name='description'/>
        <meta content='Place your blog keywords here(separated by commas)
        name='keywords'/>
        </b:if>


Now replace red coloured text with your blog's description(max 175 characters), pink coloured text with your blog's keywords seperated by commas(max 200 characters) and save your template.


You have successfully added a meta tag to your blog.There are a lot of analyzers on the web to check the accuracy of your added meta tag.You can also see which kind of meta tags improve your search engine rankings.


Put adsense in middle of your posts

If you want to monetize your blog,adsense is one of the best ways to earn some decent revenue .One of the ways of increasing your revenue through adsense is to put ads in middle of posts. This ensures a higher click through rate.Another advantage with this is that you can manage more space in your blog by putting adsense ads inside your posts.

How to put adsense ads in the middle of your posts:

TIP: for all posts regarding EDITING HTML make sure that you have a downloaded copy of your template with you just in case anything goes wrong.
  • Log in and get to DESIGN tab and in turn get to EDIT HTML. Now check on expand widget templates.
  • Find <data:post.body/> by holding ctrl and pressing F.
  • Repace it with   this code:

<div expr:id='"aim1" + data:post.id'></div>
<div style="clear:both; margin:10px 0">
<!-- Your AdSense code here -->
</div>
<div expr:id='"aim2" + data:post.id'>
<data:post.body/></div>

<script type="text/javascript">
var obj0=document.getElementById("aim1<data:post.id/>");
var obj1=document.getElementById("aim2<data:post.id/>");
var s=obj1.innerHTML;
var r=s.search(/x3C!-- adsense --x3E/igm);
if(r>0) {obj0.innerHTML=s.substr(0,r);obj1.innerHTML=s.substr(r+16);}
</script>


Replace <!-- Your AdSense code here --> with your adsense code. Make sure you parse your codes here before adding them.

Now, save your template and add "<!-- adsense -->"  to all posts in the EDIT HTML section of your posts in order to see the effect.

NOTE:
The position of your ad in the post depends where you put the above code.


9 Jul 2011

Add subscribe buttons for blogger easily

One of the ways of getting some decent and loyal visitors to your blog is through making them subscribe to your posts. The default subscribe button in blogger is not so great looking. So, after this post, you can put any image you want for the subscribe button. Here is how to do it:

subscribe button
                                                                                                                  
  • Get to DESIGN tab and select ADD A GADGET option.                    
  • Now choose HTML/JAVASCRIPT from the options.
  • Add this code in the content bar

             <a href="Feed Link"><img src="Link Of your image"/></a>

  • Select an image and upload it to any image uploading sites such as Ripway  , ImageShack and copy its location.
  • Now replace "Link of your image" with your image's link and "Feed Link" with 

                             http://yourblogname.blogspot.com/feeds/posts/default                 
  •  Save your changes. You can put this option at sidebar or also at your footer of you blog.


Remove subscribe to posts(atom) option from your blog


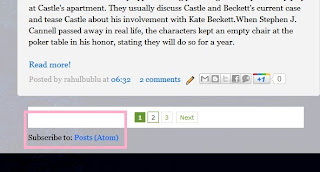
If u see properly at the footer section of your blog you can see a "Subscribe to posts(atom)" option present there.Many people don't like this because they already provide some subscribing options to readers at various positions. This post deals with removing it from the footer section.
TIP: for all posts regarding EDITING HTML make sure that you have a downloaded copy of your template with you just in case anything goes wrong.
  • Log in and get to DESIGN tab and in turn get to EDIT HTML.
  • Mark on the expand widget templates part and find the part 
  • <b:include name='feedLinks'/> and just delete it.
  • Save your settings and that's it.

If u still have no idea where it is then look at this picture
   
                                                             
OK .That's the way how to remove it.